Project managment software


Knowing myself, I immediately knew I needed a good project managment software if I wanted to make sure of a good organisation trough the FabAcademy classes. Here are the different software I came across during my research.

  • Trello
  • Taiga
  • google calendar
  • Zoho projects

  • All these software seems to have their share of pros and cons, but I decide to stick with Trello and google calendar. Trello was an easy guess since I heard about it's efficacity from some video games developper. I will then use Trello as my main project managment software but I also wanted an agenda to help me share my time between my differents tasks fabacademy related or not. Google Calendar was then the way to go for me, I find this platform really cool since I can share my schedule with my coworkers.

    « Go back to assigments page

    Website Developpement


    I had a hell a lot of fun doing my website, sure it's far from perfect but i'm really proud of the present result, it will get better and better with time, but I think I achieve something quite nice for my first attempt at working with html, css and javascript. I used Bootstrap templates to help me build something uppon. Then I tweak various little things with the understanding I got from looking at the code.

    But before doing anything, I needed a code editor (IDE) for writing my .HTML files, at first I try using Atom and was happy with it for a while, but I finally switch to Sublime text 3, I found it's interface more appealing. Atom is also great.
    I start learning html with this awsome short and straight-forward youtube tutorial This give me the knowledge necessary to do this:


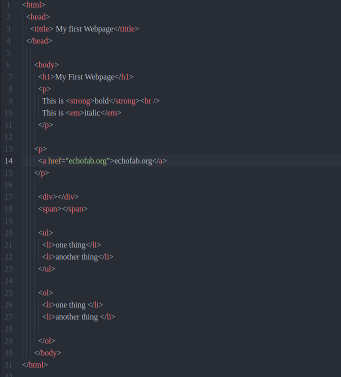
    My first webpage! what a god feeling!!!


    Then I realize it would take way too much time to write all of my code by myself, thats when I found Bootstrap This amazing tool give me access to a lot of template that I happily mixed togheter to create my own personnalised webpages. I mostly use templates found on bootsnip

    Code tips


    Here's some few simple html command I learn while doing my website.

    - To start and end a paragraph: < p > < /p >
    - Add Hyperlink: < a href="link" > word < /a >
    - Show off code in boxes: < pre > < /pre >
    - space between words: & nbsp
    - space between lines: < br > < /br >
    - Add image: < img src="imagesource" >
    - Add color to a set of word: < < span style="color:colornumber" > set of words < /span >
    - Add bold caracther: < b > < /b >

    - Add a list of things: < li > < /li >

    These are some basic HMTL command you can use, there is for sure a lot more of them and they can help you doing your website personalised and unique! But HTML is only a content programming language, for more style and interaction on your website, you will need to go further with programming with stuff like PHP, Javascript and CSS. As you can see, I did not go really far into those and my website does not look great, but If time was not an issue I will go and study further those things. Here are some useful ressource you can use for more information:

    PHP
    JavaScript
    CSS

    It wasn't an easy road, I made some mistake and i'm still having some issues with sizing image inside my carousel in my home page. But time is missing now...

    With time, I realise my website is not very esthetic. If I had more time, I would start all over and use one of the template Mathieu showed me here

    Also, since we have a really limited space for our website (300 to 600Mb), I have to find a way to compress the pictures I will use for my website. The solution I found is a GIMP 2.8 pluggin called BIMP It is a super useful tool that let you compress, modify and store pictures wherever you want. Super easy and fun tool to use. For my videos, I'll uplaud everything on my youtube account and just link the embedded link into my website.

    « Go back to assigments page

    GIT


    GIT is really usuful tool that serve as a version control system for your projects, It gives you the ability to share, modify and create multiple branch of a project. It is the perfect tool for programmers working on the same code or for keep backup and traces of your previous work.


    The way that Git work is that you push into the cloud a repository that you created on your computer, you can push on the master branch of your project, or you can also alter your project, create multiple version of the same project using additional branch. It is the perfect tool for the purpose of the Fabacademy since all student can push into their remote repository owned by the FABFOUNDATION and instructor and evaluator can comment on the issues or the good thing of ours documentation.

    I first install git on my ubuntu OS. It seems a bit confusing at first, but once I read about it and follow the tutorials, everything went fine. I use those two tutorial to help me understand git: tuto1, tuto 2

    1. First I download git on my ubuntu Laptop using this command on the terminal:
      sudo apt-get update

      sudo apt-get install git


      Then once Git was Install, I went and create an account on the gitlab repo of the fabacademy. Straight after this, I generate a SSH key for my computer. this was easy ad straight-forward, all I had to do was to run a few simple command to generate and store the SSH into my computer. To do so, I followed this simple tuto

      To generate the key the key, just enter this command line into your debian terminal.

       ssh-keygen -t rsa -C "your_email_adress" 


      you will then be able to store the key inside a folder and choose a passphrase to protect it, you can let the default storage path and the pass is optional, hit ENTER and you should see a unique randomart that represent your key appear!


      To see your key, you can then enter this command
        cat ~/.ssh/id_rsa.pub  


      . Copy it using this command
       cat ~/.ssh/id_rsa.pub | clip
      .

      All you have to do now is to go and paste this into your gitlab user option into the ssh key tab!


      Once this is done, you can now go and create a folder into your computer where you will store your lab repository. After that, open a new terminal and identify yourself on git. To do so just enter these two command:

       git config --global user.email "you@example.com"  

      and
        
      git config --global user.name "Your Name"


      CD (go) into your newly create folder via the terminal and enter this command line to clone your lab repo into the folder:
      git clone git@git.fabacademy.org:fabacademy2017/yourlab.git


      Like I said this will clone the repo int your folder, you should then see a new folder apear having the name of your lab inside your repo folder. If you do see it, good job you've done it! now all you have to do is learn the easy sequence that you will have to do each week to push your newly done work into the fabacademy repo.

      1.
      git pull 
      (this will go and see if your repo folder is up to date on the commits of others.)

      2.
      git status
      (this will tell you what is outdated on your repo folder.)

      3.
      git add .
      (this will add the new files you add to your local folder into the global repo

      4.
      git commit - m "name_of_commit" 
      (this will add a commit with a name to the repo, it's good to use name that can easily be recognized over time.

      5.
      git push
      (this will push the commit into the global repo, at this point you should then see your work in the fabacademy archive).

      Good Job!!!

    Final Project


    I still don't really know what my final project will be, but I'm a huge music fan and I know it will gravitaded around this domain. I would like to make a stereo receiver, not sure if it's in my budget scope, nor if I will have the necessary knowledge to make such a project. I looked at past years students project and found some really nice things, few months ago I had the chance to meet Loic from Aquapionners wich start as a fabacademy project and was really inspired from his work.

    After A few toughts, I decide my Final Project will be a machine that draws over sound. It's gonna be a really big challenge for me, but It's sure gonna be great to work and learn forward this objective.

    The General Idea is to have a two axes machine that will act as a drawbot. There will also be an input device that will take sound from an audio jack and convert it into waves using a FTD and a program that I will wrote on processing. Once the input will be processed, I will then output it into my drawbot.

    The project will take in account a number of process learn during the fabacademy such as interface programmation, machine design, computer aided design, electronic design and many more.

    Here is a small, ugly sketch that show the idea in general:


    As you can see, my audion device will be plug in an input device that I will design and then I will read via serial the data necessary to generate my file on the computer and will then send it to my driver motor.

    This project may seemed not that complicated, but it's really something big for me and will take a lot of work to achieve. I will make multiple iteration of the project so it starts as simple as it can be and become more and more what I dream it would be.